Create a proof schema
Where this task sits in the credentials workflow:
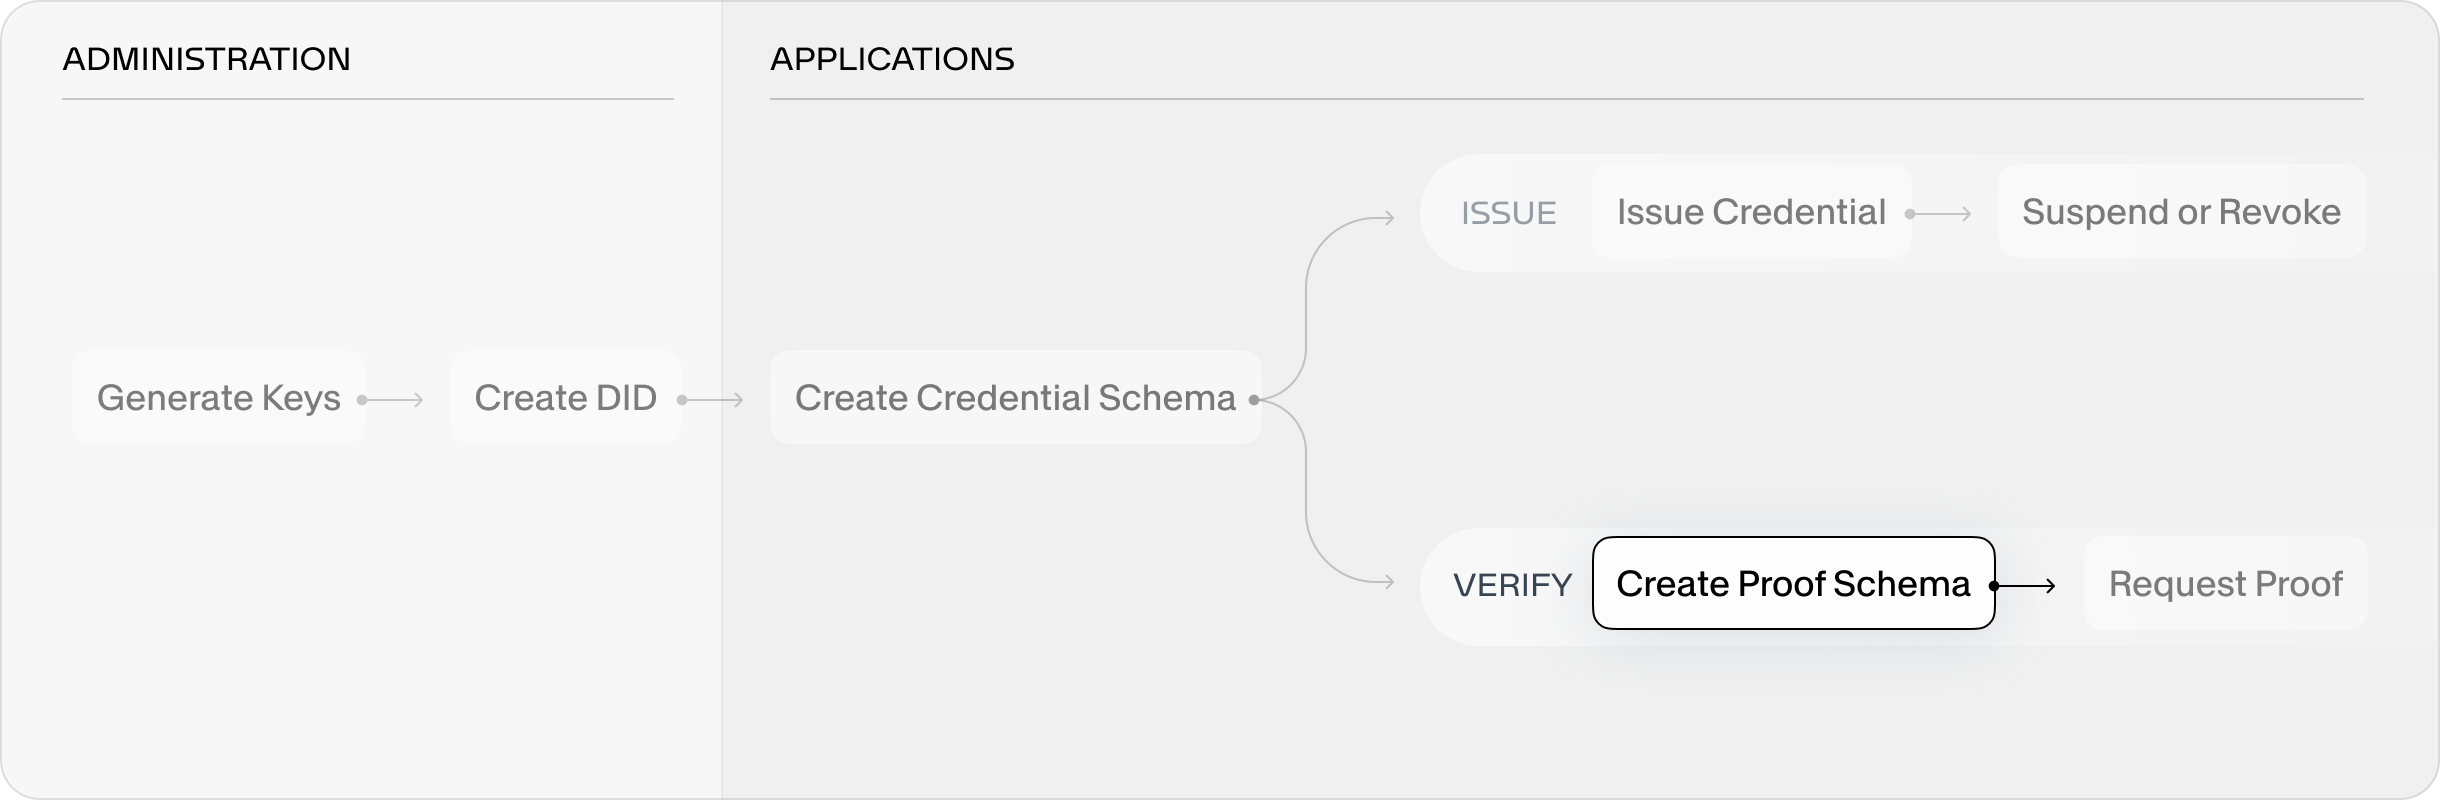
Similar to credential schemas, proof schemas are a crucial part of the digital identity credentials lifecycle. A proof schema defines the kind of information you, as a verifier, will be requesting from wallet holders. Proof schemas can be made from a subset of attributes of credential schemas in your system. This means that you can request a few attributes from one credential, a few other attributes from another credential, and so on.
In this task you will design a proof schema with which you can start requesting proofs from wallet holders.
Prerequisites
- You are logged in to the Desk
- There is at least one credential schema (preconfigured or from creating a credential schema)
To create a proof schema
-
On the left sidebar, choose Proof schemas.
-
On the top-right of the Proof schemas page, choose + New proof schema.
→ Proof schema setup opens.
-
Complete the setup, then choose Next step:
- Proof schema name – Choose an informative name.
- Data expiration – Choose the length of time that wallet holder's data, when shared in response to this proof request, will be stored in your system.
-
Complete the Request credential screen, then choose Next step:
-
Credential – Choose credential schemas from which to draw attributes to request.
-
Validity constraint – Relevant for credentials with LVVC revocation method. Choose the maximum age of an LVVC credential you are willing to accept.
-
+ Add credential – Make sure you add all credential schemas from which you want to draw attributes to request before moving on to the next step.
-
-
Complete the Request attributes screen, then choose Next step:
-
Attribute – In the dropdown, select an attribute from the chosen credential.
-
Required – Leave the box checked if a value is required for a proof to be validated when using this proof request.
-
+ Add attribute – Add as many attributes as you need, repeating the above process of selecting the attribute to request and indicating whether it is required for shared proofs to be valid when responding to this request.
-
-
Review the proof schema, then choose Save.
🎉 Congratulations! You've successfully created a proof schema!
You can now start requesting proofs with this schema. You can do this with the Desk or with the Verifier app.
- With the Desk: complete the task in requesting a proof and choose this proof schema in Step 3.
- With the Verifier app: follow the instructions to import a schema to the Verifier app.